
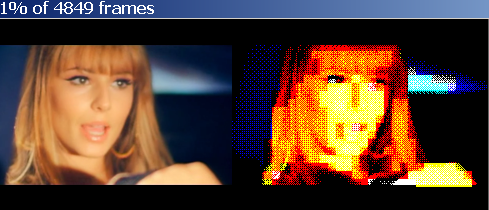
Since somebody’s asked, today I’m going to show you exactly how Friday’s Girls Aloud video was produced. It’s going to get technical though, folks, so buckle up. Or alternatively, look at this nice little picture and wait for the next instalment of the Complete Guide.

Ingredients:
Girls Aloud – Something Kinda Ooh.avi – 3:13, 640×352, 25 frames per second
Goldwave
VirtualDub
BMP2SCR Pro v2.01
Gasman’s Samplepack code
Pasmo assembler
BAS2TAP
So, we start out with a video that I sadly can’t legally upload to the website – it’s a 52MB video file, 640×352 resolution, 25 frames per second and 3:13 long. You can use whatever you like in its place though, since the process would be the same up until the programming part. Anyway, as lovely as this video is, all compressed and filled with sound, it’s not going to be much use. Step one is to get ahold of the audio data – load the video into Goldwave, and save out a .RAW file – 11025Hz, 8-bit mono.
Now we need to change the resolution of the video, so we take our starting video and load it up in VirtualDub. To change the resolution, click Video->Filters->Add Filter, then pick resize and hit OK. Set the New Size to 256 Absolute horizontal pixels, and let VirtualDub pick the vertical height. Under framing options, pick Letterbox/crop to size and set the resolution to 256×192 and hit OK, then OK again to get back to the main VirtualDub window. Click Audio and set the output to No Audio. Finally, click File->Save as AVI.
So, we’ve now got our two separate data streams. Let’s take care of the video first, since that’s pretty straightforward. Load up BMP2SCR, and through that our VirtualDub converted video. Then we pick the output (I used Colour OrdDith) and under Options we need to set it to ‘TAP stream/Delta’. We’re not going to use compression or anything, because I don’t know how it works, and besides – it’s processing time that’ll be our problem later, not file size! Click on ‘Start Converting’, and then go and read over the Complete Guide and maybe some back issues of YS3 – this is going to take a while.
When you come back, you should find yourself with a rather hefty .TAP file full of SCREEN$s. Hurrah! That’s the video done, now it’s just the audio. And this is where it gets really hairy, so put on your wellies and prepare to wade through some terrible, terrible code…
Gasman’s sampling code is in Perl, and is really quite clever. However, it only outputs one file. One sample, one file, and that’s it. We need a separate chunk of audio for each frame. We take the number of frames that BMP2SCR tells us it’s processed (4838 in our case) and divide the total size of our raw audio file by that. 2,138,399 divided by 4838 gives us 442. For some reason I’ve now forgotten (or possibly a calculation error) I’m going to divide that by two for 221 bytes per frame. Then we modify Gasman’s code to this:
#!/usr/bin/perl -w
# convert 8-bit unsigned sample to AY levels

binmode STDIN;
binmode STDOUT;

	$count	= 1024;
	$fc		= -1;
	$alt = 0;

while (!eof(STDIN)) {


	read(STDIN, $b, 1);
	$b = ord($b);
	if ($b < 2) {$lo = 0;}
	elsif ($b < 5) {$lo = 1;}
	elsif ($b < 7) {$lo = 2;}
	elsif ($b < 10) {$lo = 3;}
	elsif ($b < 14) {$lo = 4;}
	elsif ($b < 19) {$lo = 5;}
	elsif ($b < 29) {$lo = 6;}
	elsif ($b < 40) {$lo = 7;}
	elsif ($b < 56) {$lo = 8;}
	elsif ($b < 80) {$lo = 9;}
	elsif ($b < 103) {$lo = 10;}
	elsif ($b < 131) {$lo = 11;}
	elsif ($b < 161) {$lo = 12;}
	elsif ($b < 197) {$lo = 13;}
	elsif ($b < 236) {$lo = 14;}
	else {$lo = 15;}

	read(STDIN, $b, 1);
	$b = ord($b);
	if ($b < 2) {$hi = 0;}
	elsif ($b < 5) {$hi = 1;}
	elsif ($b < 7) {$hi = 2;}
	elsif ($b < 10) {$hi = 3;}
	elsif ($b < 14) {$hi = 4;}
	elsif ($b < 19) {$hi = 5;}
	elsif ($b < 29) {$hi = 6;}
	elsif ($b < 40) {$hi = 7;}
	elsif ($b < 56) {$hi = 8;}
	elsif ($b < 80) {$hi = 9;}
	elsif ($b < 103) {$hi = 10;}
	elsif ($b < 131) {$hi = 11;}
	elsif ($b < 161) {$hi = 12;}
	elsif ($b < 197) {$hi = 13;}
	elsif ($b < 236) {$hi = 14;}
	else {$hi = 15;}

	if($count>=221) {
		close A;
		$fc++;
		open(A, "> output/raw_$fc.ay");
		binmode(A);
		$count = 0;
	}
	print A chr(($hi < < 4) + $lo);
	$count++;
}
Anyway on the command line, we enter:
perl sam2ay.pl < zx_ga_sko.raw
This gives us a huge number of .AY files in the 'output' directory. (Or nothing at all if the directory doesn't exist. Make one and try it again!) Now all we need is some way to merge our audio with our screens. It turns out that Perl is quite horrible for doing this sort of thing, so we'll go with C for this one:
#include < stdio.h >
#include < stdlib.h >
#include < string.h >

/* INJECTA by Nathan Cross '08
** inject sound into bottom couple of character rows of a bmp2scr video,
** specifically Girls Aloud's 'Something Kinda Oooh'. Yes, really. */

int main(int argc, char *argv[])
{

	FILE *vid;
	FILE *snd;
	FILE *out;

	int fc			= 0;
	unsigned char checksum	= 0;
	unsigned char flags;
	unsigned char buffer;
	unsigned char bigbuf[32];
	char string[256];
	char number[256];
	int addr;
	int xctr,tctr;

	unsigned char databuffer[6144];
	int ctr;
	int total;

	printf("Started\n");

	vid = fopen("video\\zx_ga_sko.tap", "rb");
	out = fopen("video\\output.tap", "wb");

	if(vid==NULL) {
		printf("Couldn't open vid\n");
	}
	if(out==NULL) {
		printf("Couldn't open out\n");
	}
	while(fc < 4838) { // 4838

/*	# 6937 intervals
	#  6912 bytes of data
	#  4 bytes of checksum (6916, leaves 21 for header info)
	#  Our sound data goes in at 5632 from the data block, which is 5636 bytes from the start of the data
	# 6421 is 6937-4-512
	# Checksum needs to be from byte 18 in onward, all XORed...
	# 19+5632 = 5651
*/
		total = 0;
		// Copy header
		fread(&bigbuf, 1, 23, vid);
		fwrite(&bigbuf, 1, 23, out);
		total+=23;

		// Copy flags
		fread(&flags, 1, 1, vid);
		fwrite(&flags, 1, 1, out);
		total++;

	// Set checksum
		checksum	= flags;
	// Read pixel data
		for(ctr=0; ctr<6144; ctr++) {
			fread(&databuffer[ctr], 1, 1, vid);
		}

	// Read and add sound data to pixel data
		strcpy(string, "output\\raw_");
		itoa(fc, number, 10);
		strcat(string, number);
		strcat(string, ".ay");
		snd = fopen(string, "rb");
		addr = 4288;
		xctr = 0;
		for(tctr=0;tctr<221;tctr++) {
			fread(&buffer, 1, 1, snd);
			databuffer[addr] = buffer;
			addr++;
			xctr++;
			if(xctr==64) {
				xctr=0;
				addr+=192;
			}
		}
		fclose(snd);

	// Write updated screen pixel data
		for(ctr=0; ctr<6144; ctr++) {
			fwrite(&databuffer[ctr], 1, 1, out);
			total++;
			checksum ^= databuffer[ctr];
		}

	// Copy attribute data
		for(ctr=0; ctr<6848-6144; ctr++) {
			fread(&buffer, 1, 1, vid);
			checksum ^= buffer;
			fwrite(&buffer, 1, 1, out);
			total++;
		}
	// Black out the bottom two lines of attribute data
		for(ctr=0; ctr<6912-6848; ctr++) {
			fread(&buffer, 1, 1, vid);
			buffer = 0;
			fwrite(&buffer, 1, 1, out);
			checksum ^= buffer;
			total++;
		}

		// Now to output the checksum and hope it's right.
		fread(&buffer, 1, 1, vid);
		fwrite(&checksum, 1, 1, out);
		total++;
//		if(checksum != buffer) {
//			printf("Loop %i: checksum is %i, buffer is %i\n", fc, checksum, buffer);
//		}
		if(total!=6937) {
			printf("Total is %i\n",total);
		}
		fc++;
	}

	fclose(out);
	fclose(vid);

// Temp: audio is at 22016, 221 bytes long
    return 0;
}
Compile and run this, and it'll take that big fat .TAP full of screens, and those four thousand odd .AY files, and seamlessly blend the two into a file called 'output.tap'. You'll need to change the filenames and things when you do it so that it loads in your .TAP full of screens rather than mine, but at least the hard parts been done for you. Injecta places the 221 bytes of audio data below the picture, in those couple of rows of letterboxing. If the file wasn't a letterboxed one, then it wouldn't work. Also, the audio data is split into four chunks; three of 64 bytes and a final 29 byte chunk.
All we need now is some player code. Gasman's code is again the basis for this, but with a little bit of support code around it to keep it well-fed with our now slightly carved up data. On to our third language of the day with a spot of Z80 assembly...
; sample player
; need 317 tstates per sample

	org 32768

init_ay
	ld a,7			; set bits 0-5 of AY register 7 so that all channels are fixed at 'high'
	ld bc,0xfffd	; output - this way the AY is not generating waveforms of its own, and
	out (c),a		; varying the volume (channels 8/9/10) creates our own wave output instead
	ld a,63
	ld b,0xbf
	out (c),a

main_loop
	ld ix, 60000
	ld de, 17
	ld a, 00
	scf
	call 0x0556		; load header of next screen

	ld ix, 16384
	ld de, 6912
	ld a, 255
	scf
	call 0x0556		; load next screen

	ld b, 255

	di
	ld hl, 20672
	ld bc, 64
	call samplelp

	ld hl, 20928
	ld bc, 64
	call samplelp

	ld hl, 21184
	ld bc, 64
	call samplelp

	ld hl, 21440
	ld bc, 29
	call samplelp


;	ei
	jp main_loop
	ret


samplelp
	push bc		; 11

	; get low 4 bits to use as the first volume level
	ld a,(hl)	; 7
	and 0x0f	; 7

	; delay 117ish tstates
	ld b,8		; 7
zzz2	djnz zzz2

	; output that volume level to channels 8/9/10
	ld bc,0xfffd	; 10
	ld d,8		; 7
	out (c),d	; 12
	ld b,0xbf	; 7
	out (c),a	; 12
	inc d		; 4
	ld b,0xff	; 7
	out (c),d	; 12
	ld b,0xbf	; 7
	out (c),a	; 12
	inc d		; 4
	ld b,0xff	; 7
	out (c),d	; 12
	ld b,0xbf	; 7
	out (c),a	; 12

	; get the next volume level from the high 4 bits
	ld a,(hl)	; 7	; start tstate count here
	srl a		; 8
	srl a		; 8
	srl a		; 8
	srl a		; 8

	; delay 152ish tstates
	ld b,11		; 7 (orignally 11)
zzz1	djnz zzz1
				; 8

	; output that volume level to channels 8/9/10
	ld b,0xff	; 7
	ld d,8		; 7
	out (c),d	; 12
	ld b,0xbf	; 7
	out (c),a	; 12
	inc d		; 4
	ld b,0xff	; 7
	out (c),d	; 12
	ld b,0xbf	; 7
	out (c),a	; 12
	inc d		; 4
	ld b,0xff	; 7
	out (c),d	; 12
	ld b,0xbf	; 4
	out (c),a	; 12

	; move on to next byte
	inc hl		; 6

	; loop if we haven't reached the end of the sample
	pop bc		; 11
	dec bc		; 6
	ld a,b		; 4
	or c		; 4
	jr nz,samplelp	; 12

	ret
Assemble with pasmo --tap --name player player.asm player.bin.tap and it's all over bar the shouting. Make a little Basic loader with BAS2TAP, copy the three .TAP files together (Basic loader, the player, and Injecta's output) and you're all done. It'll only run properly on Fuse at the moment, but I'm sure somebody'll beat me to having it work on a +3e fairly soon.
Finally, here's the files above to save you cutting and pasting:
My modified sam2ay.pl
Injecta source/Windows application
My modified player code
The final .TAP file - works on Fuse only!
Absolutely fantastic project and great write-up.
I want to re-engineer it for my DivIDE now!
Mmmm giant Nicola
Hubba hubba.
Lawks!
all the best any of you get to the sam 16 colours or four in 512 x 192….
all the best
http://www.youtube.com/watch?v=YMIUOCJhKYQ
anyone seen datagear velesoft dma and mb-02+ dma for speccy gives multitech sam mode 2 graphics using dma
you can split this into four parts the final tap file mail it to people and then send them the file splitter .exe file to rebuild the full tap file if any one wants it i am working on it now here in prague though it depends on thye uplink speed of these wretched internet cafes so hopefully…
any one use mb-02+ dma chip or datagear velesoft
rogterjowett@gmail.com
send me your emails if you want the files fuse is brilliant first time i used it and its playing the video beautifully though it seems now and again to try to transfer a screen old tape loading style but that might be because im trying to split and upload the file into gmail and yahoo mail at the e#same time – gmail cant send the .exe file though i have managed to upload an.exe file into gmail you just have to get it saved only in the draft folder and you cant send it to anyone kind of dimn no though you can download it
http://velesoft.speccy.cz/data-gear.htm
This velesoft website and the 8bc one;
http://www.8bc.com/sinclair/index.html
these multitech screens use the dma to alter the attributes so that each byte of video has its own attirbute
the sam had a similar mode 2 where the extra 6kb of data followed 2k after teh screen data
Absolutely fantastic… Id never have believed it until I downloaded and tried it… Works fantastic on EmuZWin, incidently…
many thx for instructions!! i’ve followed it (with a little cheat 😉 ) and result is amazing. I’ve uploaded a couple of videos to youtube,
another world: http://www.youtube.com/watch?v=36jAjAy57mc
zx spectrum: watchmen: http://www.youtube.com/watch?v=rNdejIbdaIE
Love the advice. Thank you.
ld sp, address of screen to be copied rfom maybe in top ½ of ram where
external ram could be paged
pop af,bc,de,hl
exx ex a,f’
pop af, bc,de,hl
ld sp, adress of screen where you are copting to – probably in bottom
½ of ram as that is where video ram would have to be paged as the
external ram can only be in the top CD portion not AB
push hl,de,bc,af
exx exaf,af’
push hl,de,bc,af
how do i delete something?
theres fiftenn chunks you have to find them yourselves icant post all the links here
please use exe to rebuild chunks into 29mb tap/tzx file anyone convert it to a atomlite hdf for sam koop please
sorry about the other one please delete it i cant – the sodding window opened as it s a chat thing and faffed me around ooops big apols
http://cid-1c842d5b23e1e0e2.office.live.com/self.aspx/.Public/retro%20x%20lcd%20bmp2scr/Untitled%201v2tzxversion.tzx.01
http://cid-1c842d5b23e1e0e2.office.live.com/self.aspx/.Public/retro%20x%20lcd%20bmp2scr/Create^_Untitled%201v2tzxversion.exe
TAP version:
http://cid-1c842d5b23e1e0e2.office.live.com/self.aspx/.Public/retro%20x%20lcd%20bmp2scr/Create^_Untitled%201v2tapversion.exe
thankyou
you need to find the other files in teh sky drive thing it is so badly desinged that teh filenames are too long so you need to hovver bovver over each one to find the right numbers i trasnfered them in sequence but you know what sequins means to a computer….
thankyou to the library satff for restricting away from my mahcine data movements to 2mb really nice and helpful that one great thanks nothgin to do all day have a cup of tea…
http://www.youtube.com/watch?v=EmwW_6kUdHw
help
cant get bmp2scr to work anymore
virtual dubbed a 256×192 video file how small does it have to be?
http://www.worldofspectrum.org/infoseekid.cgi?id=0026639
not for one second suggesting that humble z80 can trasfner and perform attribute alterations for an 18×18 grid – might be alittle easier with two video ram pages hint hint like the 128 all have – you could do 8×4 attribtues and 384 rows with simple OUT video ram page flipping every four rows
but you’d defintely need the DMA in the MB-02+ to perform 8 pixel attirbute update like the timex hi colour and sam coupe mode 2 screen modes and read teh data in from the ide to compact flash card
2t per port read/write is that correct
can write to border port at 2t 2 but still only makes 8 pixel lines in border due to ula border colour update – weird though theres a video on youtube of the border being altered adn moved almost one pixel left or right so you maybe get smaller lines in border with faster update though SPECTRA doesnt help with this
http://www.fruitcake.plus.com/Sinclair/Spectrum/Spectra/SpectraInterface.htm
https://sites.google.com/site/ulaplus/
neither adds 40/80 column proprtional font where a second paper colour uses a screen off border port bleeding into main pixel area
3¼mips…eggnchips®€cu™
https://youtu.be/zsjTpFR0oYQ
https://youtu.be/iHcbbKZQrJQ
only 1:32 and no sample and seems to b stuck in a loop!
https://youtube.com/shorts/QkhqfBe3QZU?feature=share
what’s the point of a comment that asks for a url if it doesn’t let you choose it?
https://youtube.com/shorts/Z97sN0luei0?feature=share
https://youtube.com/shorts/Z97sN0luei0?feature=share
no I haven’t already said that this is not a duplicate comment thanks very much